
A sluice box is a simple and inexpensive piece of equipment that is used to recover placer gold from a stream or river. The basic design has been used for hundreds of years, with much of the gold discovered during the early gold rushes being found in sluice box.
The benefit of modern designs is that they are both lightweight and portable, great for the weekend prospector.
There are many different sluice boxes on the market, and they will all find gold. You can even make you own sluice box using some fairly basic tools and material. If you are going to purchase a sluice box, you should select a model that will be able to handle years of abuse. You are going to be shoveling rocks and gravel on top of it, so being too cheap and getting an inferior product will only end in frustration.
To start, find a location that you think has good potential for having gold. If you don’t know how to “read” a stream for gold, then you might want to read our article about how is placer gold deposited in a river. Once you find an area that you want to work, you need to locate a good spot to place your sluice box.
Getting a sluice box set up properly can be a tricky thing to explain, and might take a little bit of trial and error to get it just right. What you are looking for is a fairly shallow area with a decent volume of water.
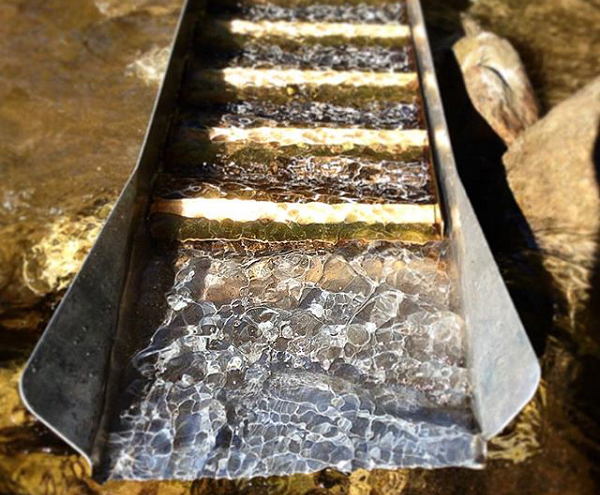
Set up your sluice box parallel to the stream flow and anchor it with several large rocks so that it is securely in place.
You want a slight decline in the riffles, a good rule of thumb is to have about 1” of drop for every foot of riffle, so a three foot long sluice box would have it’s downstream end about 3” lower than it’s upstream end. Next you want to regulate the flow of water entering the sluice box. Again, this can be a bit tricky to explain, but basically your goal is to have enough flow that when you shovel gravel into the top of the sluice, the lighter materials will work their way overtop the riffles, while the heavier materials will drop out of suspension and settle into the riffles.
You can use rocks at the entrance of the sluice to funnel more water overtop the riffles and make slight adjustment to the angle. Take a few shovels of gravel and watch closely how it is working it’s way through the sluice.
Once you are set up correctly, it’s time to move some dirt! Before you get to carried away digging, it would be smart to do some test panning to try to locate a good concentration of gold. Even when you are using a sluice box, you still want to have a good gold pan to use for sampling and locating good areas to start digging.
Since placer gold does not distribute itself evenly throughout a stream, you want to locate those pay streaks that will yield you the most gold for your efforts. Don’t just skim some gravel off the surface. The gold is heavy and you need to get down near bedrock to get the highest recovery.
Some people choose to shovel the gravel directly into the sluice box, but it is generally a good idea to classify that material before adding it. This removes the larger rocks and gravel. This provides two benefits, first being that the larger material probably doesn’t contain any gold, so there is no reason to process it. They second and main benefit is that it keeps the larger pieces of material from altering the effectiveness of the riffles in the sluice box.
You want to try and maintain a nice constant flow of water with limited disturbances, a large rocks in your sluice will cause added turbulence that might dislodge gold from your riffles and out of your box.
Now that you have some classified materials, slowly add it to the head end of your sluice box. I emphasize slowly, as too much material will clog the riffles and can easily allow gold to shoot through without getting caught.
Add a small scoop of gravel and watch it work it’s way through the box. Once you have gotten a feel for how it is processing, you may be able to increase your volume of material. Rather than using a shovel, consider using a simple garden trowel for this step. That will help ensure that you don’t overload the sluice box.
Once you are ready to process your concentrates, carefully move the rocks that you are using to anchor the sluice box and remove it from the stream. Be careful to keep it level and to not slosh too much as you are lifting it out of the water. Place the bottom end into your cleanup bucket and carefully inspect the first few riffles for visible nuggets and pickers. If you were lucky enough to recover any large pieces, they will most likely be at the very head of the box.
Next you want to clean out your concentrates into your cleanup bucket. Slide out the carpeting, miners moss, or whatever matting you are using to capture the gold and rinse it thoroughly in the bucket. Rinse the riffles and all the nooks and crannies of you sluice box until your bucket contains all of the fine concentrates.
At this point it is up to you whether you want to process the concentrates now, or reset your sluice box and continue shoveling gravel. Many weekend prospectors prefer to save their concentrates rather than pan it at the same time.
This allows them to use those precious hours to continue mining, and save the concentrates for later processing at home. You can use a simple gold pan to do the final processing or you can use an automatic panner to recover the gold.
And that is it! Using a sluice box is really one of the simplest ways to recover gold and it a great way to prospect without investing a lot of money.